Hi, it’s good to see you again! This is part two of my four-part guide for building a simple blog app using the Django web framework. Click here to go back to part one in case you missed something.
Outline
Part 1: Initializing your Django application
Part 2: Creating the Django application interface ⬅️ You are here!
- List the app’s features.
- Set-up the URLs and initialize the views.
- Set-up the templates folder.
- Create the index page.
- Create the post page.
Part 3: Getting data from Django forms
Part 4: Deploying your Django app
1. List the app’s features.
One thing that I find to be very helpful before getting my hands dirty with code is to tabulate all the information that will be relevant in creating the application interface. In this step, I’m going to show you how I do that.
| App Features | Feature Name | Path | Request Type |
|---|---|---|---|
| List all posts. | post_list |
/ | GET |
| Display a post. | post_detail |
/post/<post_id> |
GET |
| Edit a previous post. | post_edit |
/post/<post_id>/edit |
GET, POST |
| Create a new post. | post_new |
/post/new | GET, POST |
- On the first column, list all the features you would want your application to have. A simple blog site has to have at least four which are:
- To list all posts on one page.
- To display a certain post.
- To edit a previous post.
- To create a new post.
-
Now, think of a unique name to identify each feature. Write those names on the second column. It shouldn’t contain any spaces and must be entirely in lowercase because we’ll use this in our code.
- For each feature, you have to think of a unique path, the one you think is most fit to be appended to the base URL of your site if you want to make use of this feature.
- We put
/forpost_listsince we want our home page to be the index page listing all our blog posts. - We put
/post/<post_id>forpost_detailbecause in order to access a particular post we need to know its uniquepost_id. - We put
post/<post_id>/editforpost_editbecause we need to first retrieve thePostthrough itspost_idbefore we can edit it. - We put
post/new/forpost_new. Notice here that we don’t put apost_id. That’s because it doesn’t exist yet. Thepost_idis generated automatically by the system when we create a new post.
- We put
- The final column then should contain what type of request is being made when this feature is being used. The two most common types are GET and POST. GET is used to request data from a specified resource while POST is used to send data to a server to create/update a resource. Please don’t confuse this POST with our Django model
Post!- Both
post_listandpost_detailare GET requests since it requestsPostdata from the server. - Both
post_newandpost_editinvolves an html form to be filled out by the user. Therefore they can either be GET or POST requests depending on the context. It is a GET request when we display the form. It becomes a POST request when we submit the form.
- Both
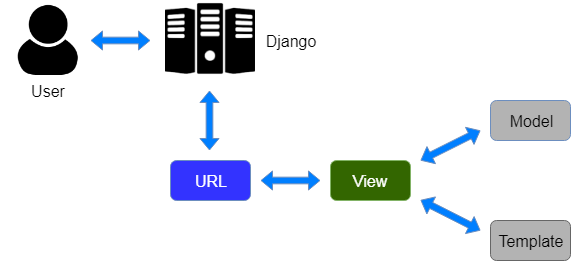
- You can now use this table to understand design model, views, and templates of your application. Django uses the Model-View-Template (MVT) design pattern to display webpages. A model is basically a Python object that helps us handle the database. A template is what the user sees in their screen (basically HTML files). A view is the interface that connects the model and the template. It makes sense of the data being passed from the model to the template and vice-versa. To explain why the table we just made could help us in designing our app, I describe the process below.
- A user requests for a resource from the Django application. Column 4 of our table tells us about the nature of the request.
- Django looks for the resource using its URL and checks if there is a path to it. Column 3 tells us what that URL should look like so that it points to a path.
- If there is a path, Django calls a view and passes to it the request. The view can access the database as well as decide which template is to be rendered as response to the request. We will use Column 2 to name the views that will connect our Post model with a template.
- Django responds back to the user sending a template as response. Templates are simply HTML which we’ll create and style later.
2. Set-up the URLs and initialize the views.
You have three things to consider for each feature: model, view, and template. We already defined our Post model in part one of this guide. Now we’re left with view and template. However, whenever we send a request to a Django application, the first thing it really does is to make sense of the URL and check if there’s a path for it. Otherwise, it will raise an error. In this section you define the paths in your application. The path defines which view should be used for the URL. We’ll use the information from columns 2 and 3 of our table.
-
Create a new file called
urls.pyinblog/. This is where you will set-up app-level URLs. -
Import
pathfromdjango.urlsas well as allviews. We pass three parameters topath(): the URL string format (column 3 of our table), the corresponding view for the URL (column 2 of our table), and a convenient name for the path which is usually the same as the view name.from django.urls import path from . import views urlpatterns = [ # Assign a view called post_list to the Root URL. path('', views.post_list, name='post_list'), # Assign a view called post_detail when displaying a post. path('post/<int:pk>/', views.post_detail, name='post_detail'), # Assign a view called post_new when creating a new post. path('post/new/', views.post_new, name='post_new'), # Assign a view called post_edit when editing a previous post. path('post/<int:pk>/edit', views.post_edit, name='post_edit'), ] -
Go to
urls.pyinmysite/. Remember that a project can have multiple apps inside of it. This is where you will set-up project-level URLs. You need include (import include) the urls of your app in the project’s urls. By default the admin URL is included so you didn’t have to worry about that in part one.from django.contrib import admin from django.urls import path, include # add include urlpatterns = [ # Include path for admin path('admin/', admin.site.urls), # Include all URLs defined in blog/urls.py path('', include('blog.urls')), ] -
To check if our paths are working, let’s set up dummy views in
blog/views.py. Go ahead and add a simpleHttpResponse()to render plain text signifying where you are in the app. We’ll know more about views in the latter part.from django.http import HttpResponse def post_list(request): return HttpResponse("You are at the index page.") def post_detail(request, pk): return HttpResponse("You are at post: %s." % pk) def post_edit(request, pk): return HttpResponse("You are editing post: %s." % pk) def post_new(request): return HttpResponse("You are creating a new post.") - Run the server and go to
http://localhost:8000. You should be able to see the index page.Rendering post_list template at
http://localhost:8000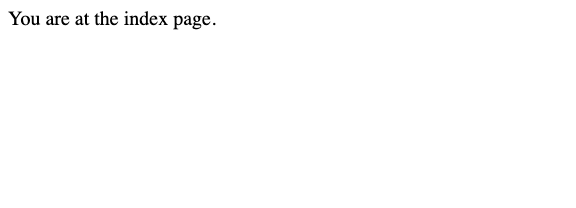
- Trying going to a post with any id e.g.
localhost:8000/post/99/. You shall see the id number you chose in the webpage: “You are at post: 99.” Note that your dummy view doesn’t care about whether or not the Object with that id really exists, so at this point you can input any id as long as it’s an integer.Rendering post_detail template at
localhost:8000/post/99/
- Trying editing a post with any id e.g.
localhost:8000/post/11/edit/, and you should see the text: “You are editing post: 11.” on your browser.Rendering post_edit template at
localhost:8000/post/11/edit/
- Finally, try creating a new post by visiting
localhost:8000/post/new/, and you should see “You are creating a new post.” on your browser.Rendering post_new template at
localhost:8000/post/new/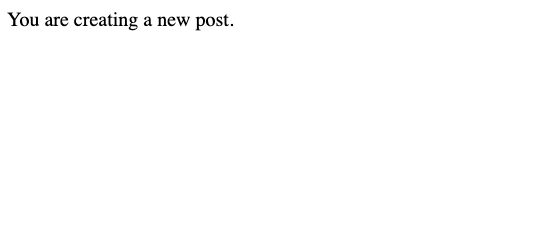
🚧 Hey there, just a checkpoint!
Having too much fun or is it just too much? Regardless, I just wanted to congratulate you for your accomplishments so far. At this point, you now have an understanding of how Django processes URLs and a faint idea about how views work. Take time to process it. If you want to take a break before going to the next part, then go on ahead, you deserve it. 👍🏽
Now that you already have your paths working, you can now move on to creating views and templates to display each of our webpages. We’ll set up a view and template for each of our app features. But first, let’s have a recap. 🤔
🔍 What’s in a view?
- A view is where you put the logic of the app.
- All views receive at least one parameter named request which contains data passed from the template. Parameters can also be passed to a view via the URL as you will see in
post_detailandpost_edit.- Views can modify the database through models.
- Views can send information back to their templates or redirect to another template. We store this information in a variable called
contextfor cleaner code.🔍 What’s in a template?
- A template is the interface that the user sees in their computer screen.
- A template is both defined by its URL and its content.
- A template can be rendered by any view.
- A template can receive data from the view. A template can also receive data from the user through an HTML form.
- A template can send data to a view through a POST request.
Our approach would be to construct our app’s features one by one. For each feature, we will create a view then its corresponding template. The next section is important in keeping our templates organized and our workflow smoother. Now, back to regular programming! 😉
3. Set-up the templates folder.
You already have an initial set-up for your views. So far, you’ve constructed dummy views for your app’s features. Now, let’s set-up dummy template files to be rendered by our views.
-
Create a new folder under the
blog/directory namedtemplates/and within it create another directory namedblog/.blog └───templates └───blog - Navigate to
blog/templates/blogand create files with the names of your views.- post_list.html
- post_detail.html
- post_new.html
- post_edit.html
- To see if it’s working, put plaintext in it like we did in the dummy views.
post_list.html: “You are at the index page.”post_detail.html: “You are at post detail page. “post_new.html: “You are at new post page.”post_edit.html: “You are editing a post.”
-
Then, go ahead and update the views so that it renders your newly created template files. Add first the line importing
renderfromdjango shortcutsas we’ll use it to render the templates.from django.http import HttpResponse from django.shortcuts import render # Add this line. def post_list(request): return render(request, 'blog/post_list.html') def post_detail(request, pk): return render(request, 'blog/post_detail.html') def post_edit(request, pk): return render(request, 'blog/post_edit.html') def post_new(request): return render(request, 'blog/post_new.html') - To check if you did things right, go ahead and run the server and visit
localhost:8000and test the URLs. It should display the templates.
4. Create the index page.
Alrighty! Now we begin to create the REAL views. Let’s do it chronologically, starting with post_list, your app’s index page. Your app already knows which templates should be rendered for each view. You can now construct the webpages and pass values from views to templates. In this guide will always store those values in a variable called context and pass it through the render() shortcut.
-
All of your app views are in
blog/views.py. Open it and paste the following lines of code after the old imports. The function of these new imports will be clear while you define the views yet again.from django.http import HttpResponse # New imports: from .models import Post # To have access to our Posts. from django.utils import timezone # To help us rearrange posts according to publishing date. from django.shortcuts import render, get_object_or_404 # To render templates and get existing objects. -
Delete the contents of your previous dummy view for
post_list, and construct a new one. This newpost_listview will render all posts in a page that calledblog/post_list.html.def post_list(request): # Get all published posts and sort by published_date. posts = Post.objects.filter(published_date__lte=timezone.now()).order_by('published_date') # We store in context things from here that we want to send to the template. context = { 'posts' : posts } # Render post_list.html template. return render(request, 'blog/post_list.html', context) -
Now, it’s time to construct the template
post_list.html. Remember that you passed data from the view calledposts. The nice thing about Django templates is that you can putpythoncode in it in between{ %and% }or{ {and} }. Go ahead and display all of the posts through aforloop.<div> <h1><a href="/">My Blog</a></h1> </div> {% for post in posts %} <div> <h2><a href="">{{ post.title }}</a></h2> <p>published: {{ post.published_date }}</p> <p>{{ post.text|linebreaksbr }}</p> </div> {% endfor %} -
To check this, go ahead and run the server. When you go to
http://localhost:8000, you should see a list of posts like so.Rendering post_list template at
http://localhost:8000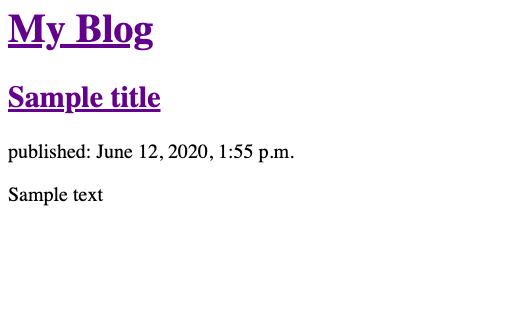
5. Create the post page.
You’d want to link those Post titles in the index page to their respective Post pages. To do that, first you must construct the post_detail view that should render a template displaying the contents of a certain Post.
-
Redefine the
post_detailview as follows. This new view receives the request (request) from the user as well as a primary key (pk) from the URL as what was pointed to . This key is the unique identifier of aPostin our database. Useget_object_or_404()to handle the error if thepkdoes not correspond to anyPost. Otherwise, pass the retrievedPostobject to the template calledblog/post_detail.html.def post_detail(request, pk): # Get post using the primary key from the URL # Return 404 if it doesn't exit post = get_object_or_404(Post, pk=pk) context = {'post' : post} return render(request, 'blog/post_detail.html', context) -
Unlike the previous dummy view, the
post_idis now used by the view to retrieve aPostobject from the database. Now recreate thepost_detail.htmltemplate.<div class="post"> <h2>{{ post.title }}</h2> <div class="date"> {{ post.published_date }} </div> <p>{{ post.text|linebreaksbr }}</p> </div> -
Now that you have a view and template for
post_detail, you can now go back to thepost_listtemplate and make the Post titles link to thepost_detailtemplate. This line of code tells you that link points to thepost_detailpath, which should call thepost_detailview passing to it the Post’s primary keypk, and finally rendering thepost_detailtemplate.<h2><a href="{% url 'post_detail' pk=post.pk %}">{{ post.title }}</a></h2> - Now, you can test if that is true by going to the first
Postyou have created previously using the Django shell. Go to that page through the index page.Rendering post_detail template at
localhost:8000/post/1/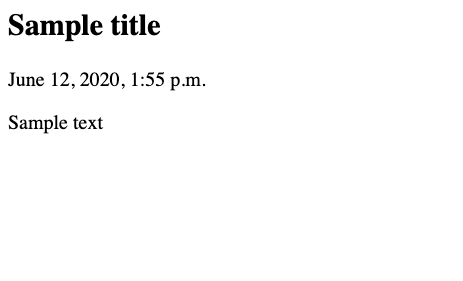
- You can also try going to a non-existent post through the URL and you should see a 404 error.
Rendering default error_404 template at
localhost:8000/post/20/as there are no post withid=2.
Wow! You’ve made it this far! 👏🏽
Hey, you’ve reached the end of part two! Give yourself a pat on the back and take time to process what you’ve learned so far. At this point you now have an index page and a post page. That’s proof that you’ve obtained a deeper understanding of how models, views, and templates work. In the next part, we’ll discuss how to receive information from the user’s end through Django forms. Click here to continue.
